
Table of Contents
ToggleIf you’re taking control of your home’s heating and cooling, the Ecobee Smart Thermostat Premium is a solid choice, but only if you know how to set it up and use it properly. This guide walks you through installation, setup, app navigation, and scheduling strategies so you can dial in comfort and energy savings without calling a technician. Whether you’re replacing an old thermostat or upgrading to smarter climate control, we’ll cover everything from initial wiring to fine-tuning temperature schedules. You don’t need advanced electrical skills, but you do need a methodical approach and attention to wire labeling. Let’s get your system running.
Key Takeaways
- Installing the Ecobee Smart Thermostat Premium requires proper wire labeling, power shutdown, and attention to the critical C wire connection to ensure system stability and WiFi connectivity.
- The Ecobee Smart Thermostat Premium integrates seamlessly with Alexa, Google Home, and HomeKit, enabling remote temperature control and voice commands from your smartphone or smart home devices.
- Creating a customized heating and cooling schedule can reduce your monthly energy bill by 10–15% annually, with each degree of setback during sleep or away time saving 1–3% monthly.
- Use the app’s monthly energy reports to spot usage spikes and inefficiencies, such as clogged filters or poor insulation, allowing you to optimize performance and maintain comfort.
- Enable Eco+ and Follow Me features gradually after 2–3 weeks of stable usage patterns to allow the Premium’s machine learning to accurately learn your household’s occupancy and temperature preferences.
- Position your thermostat away from direct sunlight, heating vents, and exterior walls to ensure accurate temperature readings and reliable HVAC system control.
What Is the Ecobee Smart Thermostat Premium and Why It Matters
The Ecobee Smart Thermostat Premium is a wall-mounted device that controls your HVAC system and learns your household patterns to optimize heating and cooling. Unlike basic thermostats, it connects to your home WiFi, syncs with your smartphone, and integrates with popular smart home platforms like Amazon Alexa, Apple HomeKit, and Google Home.
What sets the Premium model apart is its advanced occupancy detection and voice control, it can sense if rooms are occupied and adjust temperature zones accordingly. It also runs reports on your energy consumption, helping you spot inefficiencies. The device works with most 24-volt HVAC systems (furnaces, heat pumps, air conditioners, and boilers), but it won’t work with 110-volt systems or certain specialized equipment.
Why does this matter for DIY homeowners? Control and knowledge. Instead of guessing why your heating bill spiked, you can see actual usage trends. Instead of manually adjusting the thermostat daily, you set a schedule once and let the device handle it. It also means fewer service calls, many problems can be diagnosed through the app before calling an HVAC tech.
Before you buy, confirm your system voltage and wiring type. Independent reviews like the best smart thermostat comparisons detail how the Premium stacks up against competitors in real-world conditions.
Installation and Initial Setup Requirements
Preparing Your Home and Gathering Tools
Installing the Ecobee Premium yourself is doable, but it demands precision. A single misconnected wire can prevent the system from starting, or worse, damage your HVAC equipment.
Before you touch anything, turn off power to your HVAC system at the breaker and thermostat. This is non-negotiable, working live wires on a furnace circuit is a shock and fire hazard.
Gather these tools and materials:
- Screwdriver set (flathead and Phillips)
- Wire stripper (to expose about 1/4 inch of conductor if needed)
- Needle-nose pliers (for finicky wire insertion)
- Masking tape and permanent marker (to label wires before removal)
- Drywall anchors and screws (if mounting to drywall instead of studs)
- Wire nuts or terminal blocks (usually included with the thermostat)
- Flashlight or headlamp
- The installation manual (download the PDF from Ecobee’s support site if yours is damaged)
Preparing your space:
- Locate your existing thermostat and note what wires are connected. Use masking tape to label each wire by its terminal letter (R, C, W, Y, G, etc.). Photograph the existing setup as backup reference.
- Remove the old thermostat faceplate carefully: many older units have minimal insulation, and you don’t want to accidentally touch live wires if the breaker isn’t fully isolated.
- Check the wall cavity for obstructions, debris, or old drywall dust. If the old thermostat’s wiring runs through conduit, note its path, the Ecobee should follow the same route.
- Position the new Ecobee roughly at eye level, ideally away from direct sunlight, heating vents, exterior walls, and tall furniture. A thermostat in sunlight reads inflated temperatures: one near a vent reads falsely cold.
Wiring the device:
- Remove the Ecobee faceplate to expose the terminal block at the rear.
- Carefully disconnect the old thermostat’s wires one at a time (keep your labels on them) and insert them into the Ecobee’s matching terminals.
- The C wire (common) is critical. If your old system lacks a C wire, Ecobee sells a power bridge accessory that simulates one. Without it or the accessory, the device can’t maintain a WiFi connection.
- Match each wire color to its function: Red (power), White (heat), Yellow (cool), Green (fan), Blue (common), and any auxiliary colors according to your furnace specs. Refer to the manual’s wiring diagram, don’t guess.
- Once all wires are seated, secure the Ecobee’s base plate to the wall with the included anchors, ensuring it’s level.
- Restore power at the breaker, press the power button on the device (or turn on the furnace), and the screen should light up within 10 seconds.
If the screen stays dark: Recheck the C wire and main power connections. A loose wire is the most common culprit. If it’s truly stuck, take a photo of your old thermostat’s wiring, power off, and contact Ecobee’s support, they’ll help you diagnose before you spend more time troubleshooting.
Navigating the Display and Core Features
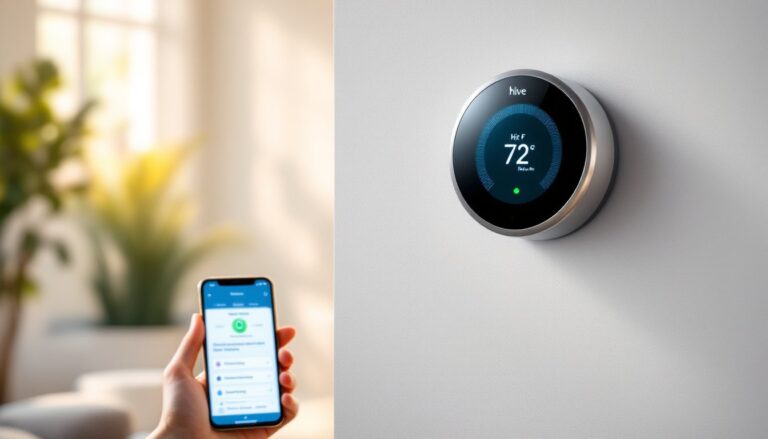
Once powered up, the Ecobee Premium’s display shows a clean, readable interface. The main screen displays current temperature, setpoint (target), humidity, and time. Navigation is touch-sensitive, swipe left or right to scroll through menus, tap to confirm, and hold to access quick settings.
Key display sections you’ll use:
- Current Temperature: Top of the screen. If it fluctuates wildly, the device may be in direct sunlight or near an air vent, move it.
- Setpoint: Your target temperature. Tap and drag the slider or use the plus/minus buttons to adjust.
- Menu (gear icon): Access settings, WiFi configuration, system diagnostics, and display preferences.
- Mode: Heat, Cool, or Auto. Choose based on season. Auto switches between heating and cooling as needed (use it in spring and fall).
- Fan mode: On, Auto, or Off. Auto runs the fan only when the system is actively heating or cooling. On runs it constantly (useful if you want circulation without temperature adjustment).
Eco features on the home screen:
- Eco+: Ecobee’s optional machine-learning mode that adjusts temperatures when nobody’s home or sleeping. You enable it in the app: it tracks occupancy patterns over weeks and optimizes automatically.
- Follow Me: If you have room sensors (sold separately), the thermostat prioritizes comfort in occupied rooms.
- Schedule icon: Shows upcoming schedule changes: tap to view or override temporarily.
What the status icons mean:
- Flame icon: System is heating.
- Snowflake icon: System is cooling.
- Fan icon: Fan is running.
- WiFi symbol: Connectivity status. If it shows a weak signal, move your router closer or consider a mesh network extender.
The display is intuitive, but the app is where you’ll spend most of your time controlling the system and reviewing reports.
Connecting to the Ecobee App and Smart Home Integration
The Ecobee app is where the Premium shows its value. Download it from the Apple App Store or Google Play, create an Ecobee account, and follow the pairing wizard.
To add your thermostat to the app:
- Open the Ecobee app and tap “Add Device.”
- Select “Thermostat” and scan the HomeKit code (QR code on the back of the device) or enter the serial number manually.
- Select your home WiFi network and enter the password. The thermostat will connect within 30 seconds: you’ll see a checkmark confirmation.
- Name your device (e.g., “Main Floor Thermostat”) and assign it to a room for organization.
Once connected, the app gives you:
- Remote control: Adjust temperature or mode from anywhere, anytime.
- Usage reports: Daily, weekly, and monthly breakdowns of heating and cooling energy use. Compare your consumption to neighbors’ (aggregated, anonymized data) to gauge efficiency.
- Alerts: Get notifications if the system has an error, if humidity drifts outside your preferred range, or if someone manually adjusts the temperature.
- Voice control: If you have an Alexa device, link the Ecobee account to Alexa and ask, “Alexa, set the temperature to 72 degrees.” The same works with Google Home and Siri (via HomeKit).
Smart home integration tips:
- HomeKit: Tap “Add to Home” in the app to include the Ecobee in HomeKit. It then works with HomeKit Automations, you can trigger heating or cooling based on time, occupancy, or other HomeKit device states.
- IFTTT (If This Then That): Link your Ecobee account to IFTTT to create custom automations, for example, “If temperature drops below 50°F, send me a notification.”
- Routines: In Alexa or Google Home, add your Ecobee to routines. “Good night” can lower the temperature and turn off lights simultaneously.
Don’t overwhelm yourself with integrations on day one. Get the thermostat comfortable and stable, then add smart home connections.
Scheduling, Temperature Control, and Energy Savings Tips
Schedules are where smart thermostats earn their keep. Instead of waking at 6 a.m. and manually turning on the heat, you set it once and walk away.
Creating a schedule in the app:
- Tap the Schedule icon (usually a calendar or clock on the home screen).
- Select the day or choose “Repeat Weekly” for a recurring pattern.
- Set wake time (occupied, normal comfort), daytime (you’re out, set back a few degrees), dinner time (occupied again), and sleep (occupied, slightly cooler for better sleep).
- Assign temperature setpoints for heating and cooling to each period. Winter example: wake 70°F, away 65°F, evening 70°F, sleep 68°F.
- Save and confirm the schedule displays correctly across all days.
Why this matters: Every degree you lower (in heating season) or raise (in cooling season) for 8 hours a day cuts about 1–3% off your monthly energy bill, depending on climate. A well-tuned schedule can trim 10–15% annually.
Energy-saving practices with the Premium:
- Setback strategy: In winter, aim for 2–3 degrees lower during sleep or when away. In summer, aim 2–3 degrees higher during sleep or away. Your system won’t work harder rebounding: comfort timing matters more than aggressive setbacks.
- Review usage reports monthly: Open the app’s Energy tab. Spot unusual spikes (maybe a stuck air damper, poor insulation, or clogged filter). A new furnace filter every 3 months keeps the system efficient.
- Humidity management: The Premium displays relative humidity. In winter, aim for 30–50% RH (low humidity causes static and discomfort). In summer, aim for 40–60% RH (high humidity makes rooms feel clammy). If humidity is consistently off-range, your HVAC may have an issue, poor insulation, a leaky duct, or an undersized humidifier.
- Avoid constant manual overrides: If you’re always bumping the temperature, adjust your schedule instead. Overrides teach the system to ignore the schedule, wasting energy.
- Use Eco+ cautiously at first: Machine learning takes 2–3 weeks to settle. If your usage patterns vary (shift work, seasonal changes), Eco+ may misinterpret your needs. Leave it off initially and enable it once patterns are stable.
Independent testing shows the Ecobee Premium’s efficiency features outperform basic models, but only if you use scheduling and occupancy features consistently. Set it, monitor it monthly, and adjust seasonally for best results.
Conclusion
Installing and managing the Ecobee Smart Thermostat Premium is within reach for any homeowner who’s comfortable with basic wiring and willing to read the manual. The installation itself takes 30–60 minutes if you’re methodical about labeling wires and confirming power is off. Once live, the real payoff comes from using the app, setting schedules, and trusting the system to optimize your comfort and energy bills. Start simple, get comfortable with daily control and monthly reports, then layer in smart home integrations and Eco+ features as you grow familiar with the device. Your thermostat should work for you, not the other way around.